Wildlife Photography Tutorial with the Canon R7 | Tony & Chelsea
Wildlife Photography Tutorial with the Canon EOS R7
Tony and Chelsea Northrup demonstrate how to set up the
Canon EOS R7 mirrorless camera for both perched and flying bird photography. They cover essential camera settings, autofocus tracking techniques, and lens recommendations for capturing detailed wildlife images.
Tony [voiceover]: This tutorial is made possible by Milford Photo, the world's best camera store. If you're passing through Connecticut, browse through their amazing selection of photography gear. If you're shopping online, their photography experts can answer your questions. Thanks, Milford Photo!
Tony: Maybe you're interested in wildlife photography with the Canon R7 or any other camera. The best place to start is at a bird feeder, maybe even in your own backyard, because wildlife photography is mostly about getting close to nature, both emotionally and physically. I'll go over the camera settings, I'll pull out the big lenses, but I want you to know that the best wildlife photographers can hear a murder of crows calling and know that they've found food, or maybe they're warning each other about a predator. They can hear a little chirp and know that there's a cardinal somewhere in a bush and that they should try to find it.
Tony: Without that appreciation and understanding of nature, it doesn't matter what your camera settings are or how much you spend on camera gear; you just won't be able to get good pictures. But the good news is, when you start wildlife photography, you will inevitably develop that appreciation of nature, and that is my favorite thing about wildlife photography.
Tony: So, this is going to cover flying birds in just a little bit, but first, I'm going to get you set up for perched birds, which are actually a lot easier to do and require completely different settings.
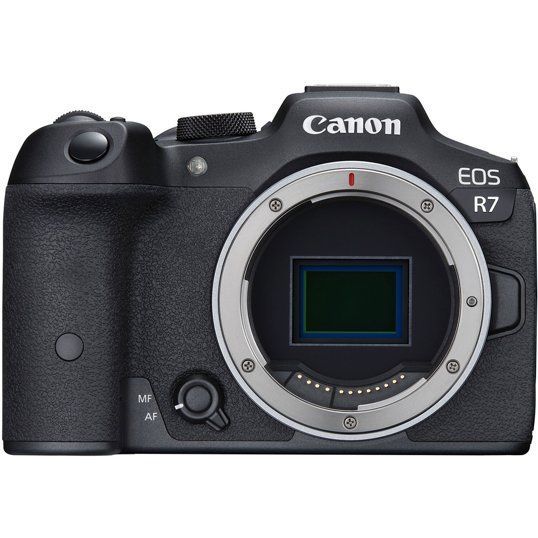
Tony: So on my Canon R7 here, I'm going to hit the menu button, and on the camera tab, the very first page, select image quality. Here, we're going to tap CRAW, and for JPEG, we'll just press that horizontal line to turn it off. What we've done is configure the camera to capture RAW files. RAW files capture way more detail in highlights and shadows than JPEG files do. This allows you to more heavily post-process your images. There are two types of RAW file: RAW and CRAW. CRAW is Canon's RAW file and it's just compressed so it takes up less space, and in wildlife photography, you'll find you can easily take hundreds or maybe even thousands of pictures, so you're going to be really glad for saving a little bit of storage space.
Tony [voiceover]: Next, again in the menus, we're going to turn on the silent electronic shutter. On the camera tab, page 7, go to silent shutter function and set that to on. Now your R7 shoots completely silently.
Tony: Back in the DSLR days, when I was shooting with a Canon 7D, the shutter could be so loud that you would only get one shot of a perched bird because it would make a loud clank and the bird would immediately take off. With the silent shutter, I can stay at peace with the birds without disturbing them. Sometimes I can get dozens or hundreds of shots of a perched bird and then pick the one very best moment. And I also love not disturbing the wildlife.
Tony: Next, let's turn on Animal Eye Detect AF.
Tony [voiceover]: Hit the menu button, go to the AF tab, and go down to subject to detect and select animals. Under eye detection, select enable.
Tony: Now, in some circumstances—not all circumstances—the camera will actually detect a bird or other type of animal, and if the eye is visible, it will focus specifically on that eye. Especially when we start using big telephoto lenses, the depth of field—the amount of the frame that's actually sharp—is so narrow that it's really, really important to focus on the eye. If you focus on the wing of a bird, the entire bird could end up looking out of focus.
Tony [voiceover]: Now let's grab the mode dial and set it to shutter priority (Tv). In shutter priority, you control the shutter value by using the main dial here next to the shutter button.
Tony: You can see I can quickly adjust the shutter speed by scrolling it to the left or right. A good starting point for a beginner for perched birds is 1/500th of a second.
Tony [voiceover]: If the bird were to start flying, you might roll your finger to the right and spin it up faster, something like 1/2000th of a second.
Tony: Or if you're feeling confident and you want to get cleaner, sharper images, roll your finger to the left and use a longer shutter speed.
Tony [voiceover]:I often shoot at 1/250th of a second, 1/125th of a second, or even all the way down to 1/60th of a second.
Tony: Every time you double your shutter speed—for example, going from 1/250th to 1/125th of a second—you're allowing the camera to grab twice as much light, and that will drastically reduce the amount of noise in the image. However, keeping the shutter open longer gives the bird more opportunity to move, or the branch to wiggle, or the wind to move the leaves, and that can reduce the sharpness of the image. So you're trying to find the perfect shutter speed where at least some of your pictures are sharp.
Tony: But here's the thing: you don't have to get all of your pictures sharp. You really only need one picture to be sharp, and the R7, at least with faster shutter speeds, is able to capture up to 30 frames per second. So in a single second, you could capture 30 frames and pick the very best, sharpest one, and then delete all the others. So let's take advantage of that by using a slow shutter speed to improve the sharpness.
Tony: I'll show you how to select that continuous shutter now.
Tony [voiceover]: Hit the menu button, go to the camera tab, page 7, and go to drive mode. Now select high-speed continuous +, and when you take pictures, you'll see a white box around the frame blinking really fast.
Tony: That indicates that you're taking pictures. And the first few times you use silent shutter with 30 frames per second, you're going to end up with hundreds or thousands of pictures to go through. It can be a lot. So eventually, over time, you'll learn to kind of manage that and not overshoot.
Tony: Now let's set the autofocus operation and autofocus points.
Tony [voiceover]: In the menu, go to the AF tab, page 1. For AF operation, make sure that's set to Servo.
Tony: Servo means it's focusing continuously on potentially moving subjects. While your bird might be perched, using continuous autofocus is going to be more accurate because a bird that's on a branch is never actually perfectly still. The entire tree moves in the wind, and the slightest bit of missed focus can mean a blurry picture.
Tony [voiceover]: Right under that is the AF area. Select that, and I use spot AF. Spot AF focuses on a very small part in the middle of the frame, and you could adjust where it's focusing by touching the back of the screen.
Tony: Or, because your eye will probably be to the viewfinder, you can use the thumbstick here to move it around. But you don't have to move it around; you can leave it dead in the center. And if you want to recenter it, just push the thumbstick here right in the middle, and that will recenter it.
Tony: Here's how we can avoid ever having to manually move that focusing point.
FEATURED CAMERAS & LENSES

Tony [voiceover]: Go into the menu one more time, and on the AF tab, page 1, select subject tracking and then set that to on.
Tony: Now, whenever you half-press the shutter to track a subject, it will lock onto that subject and continue focusing on it even when you focus and recompose. Now, if you see an animal, put that focus point as close to the eye as possible, half-press the shutter, and the camera will lock onto it. Now you can recompose so the subject isn't necessarily in the middle of the frame, and the camera will stay locked onto it.
Tony: Now our camera is set up perfectly for shooting perched birds, but we don't want to have to go through that whole process every time we take pictures, right? So let's set custom settings to C2 on the mode dial to these settings. I'm going to press the menu button, I'm going to use the wrench tab, page 6, and select custom shooting mode (C1-C3), and now I'm going to select register settings and choose custom shooting mode C2, and select OK. Now anytime I want to take pictures of perched birds, I simply set the mode to C2. By selecting C2, we instantly restore all of those settings, and we're ready to go.
Tony: Now let's look at the cool stuff: the big lenses that'll help you get better results. If you got the 18-150mm kit lens with your Canon R7, that's a pretty good way to start wildlife photography. Zooming all the way in, you won't be able to fill the frame with birds usually, but you'll be able to get close enough that if you crop it later, you can get a pretty decent, usable picture.
Tony: There is a few steps up that aren't too expensive though, and if any of this gets too complicated, you can always call the people at Milford Photo, and they can help you pick the right gear for what you're trying to do. I mean, if you're in the Connecticut area, definitely go in and talk to the people there. They're extremely helpful. But if you're shopping online too, these are people you can actually call and get to answer some questions for you.
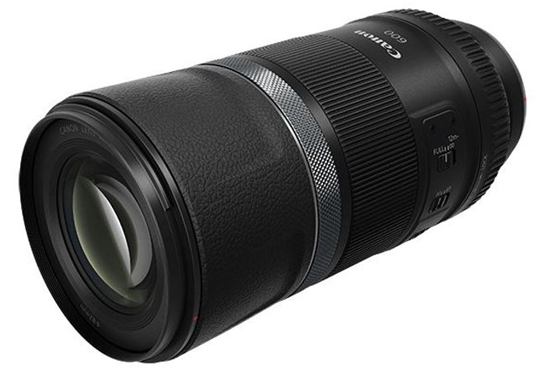
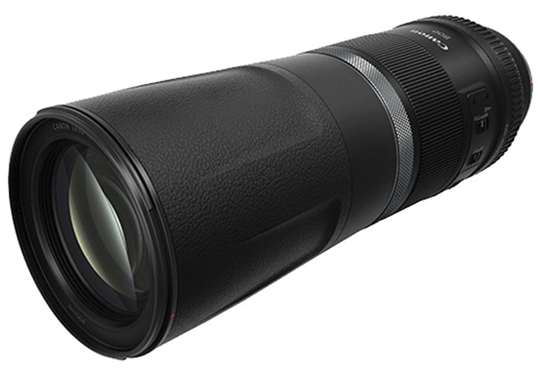
Tony: So I'm going to show you a pair of lenses that are my favorite. These are the absolutely amazing Canon 600mm f/11 and 800mm f/11, and they're remarkably inexpensive for the results they produce, but they're also extremely lightweight and very compact and portable. They both have a trick up their sleeve, in that when you stow them away, they look like this, but then you unlock this and pull it out before you shoot, so you can see they actually become significantly longer.
Tony: Now, if you're experienced with camera gear, you might have heard me say that they're f/11 lenses. In the DSLR world, cameras like the 7D, the Canon 90D, they couldn't really autofocus with f/11, and so you might think these don't work well, but with the R7 or other mirrorless cameras like the R5, they autofocus fantastic. Now with the R7 in particular, I'd probably mostly steer you towards this 600mm f/11 because the 800mm f/11 here is going to be very tight. It's going to be very hard to find birds in the frame. So you'll get great results out of it; it's just, especially for a beginner, you're looking through such a narrow little hole that it can be really tough to line things up.
Tony: A few tips on using these, especially with the 800mm f/11: the minimum focusing distance isn't that good. You can't get that close to your subjects. Especially with small birds, you might not be able to get close enough to focus on them and fill the frame. There's an easy way to solve that, and it's an extension tube. You want to find a Canon RF extension tube and put on 12mm, maybe 30mm of extension, and that will allow you to get close enough to actually fill the frame with the bird. And if that doesn't make perfect sense to you, again, the people at Milford Photo can help you out.
Tony: Using a slow shutter speed is also really key with either of these lenses. Because f/11—they're not letting in a whole lot of light. F/11 is a pretty small aperture opening like that. So the slower shutter speed is really going to pay off with good results. Use a slow shutter speed like 1/125th; even with this 800mm, you can get it handheld, and it will produce good results, and just take lots of pictures. Take advantage of that 30 frames per second.
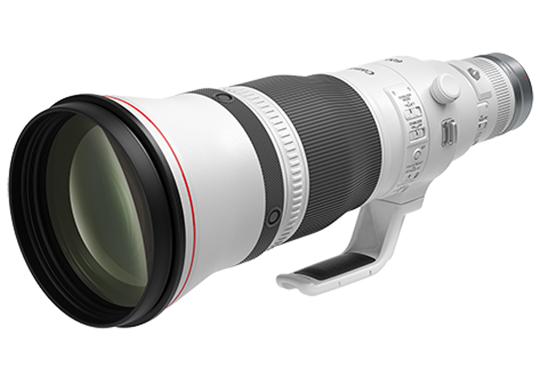
Tony: This is the Canon 600mm f/4, and well, it is huge and heavy. This lens will run you about $13,000, and so as a result, a lot of people rent them. But I actually think they're a really good investment for serious photographers. Even if you're not a professional photographer, you know, you can pick one of these up from Milford Photo, and they will retain most of their value for many, many years. So sometime in the future, if you decide to move on to other gear, you can sell it and get most of your money back. They're the best you can possibly get.
Tony: Now you might think, "It's only 600mm, that's the same as that other much less expensive lens that you showed me." The difference isn't the focal length; it's the aperture. See, this is an f/4 lens, while this is an f/11 lens. That means that this big boy gathers 3 stops more light, or 8x more light, than this one does. That means you'll need 8x more light to get the same quality of images out of this, and when you're taking pictures of birds, which are often in the shade in the woods, you don't usually have that option. So you're going to produce much cleaner images with it.
Tony: But you'll also see the difference in the way the background is rendered. This fast f/4 lens will produce incredible bokeh that separates your subject from what is often a very cluttered, wooded background. That's why professionals and serious wildlife photographers will spend the extra money on something like this. But don't feel like you need it from day one. You can take years of developing your skill, and that's going to make a way bigger difference in your photography.
Tony: You want to do everything you can to avoid disturbing the birds, both because that's nice and because you don't want to scare them away and miss your opportunity to get a picture. So avoid direct eye contact. So maybe turn your head and look at them in the periphery of your eye, and wait until they're perched and you're ready to shoot to actually go in and take the picture quickly and silently.
Tony: You might also find that using a tripod helps you move less and thus disturb the wild animals less. Now, I find it easier to handhold, especially with a nice small camera like the Canon R7. But, but every time you see a bird, you're going to end up picking your camera up like this, and this big movement can startle the bird. So if you are sort of camping out at a bird feeder for a while, it might make sense to set it up on a tripod. I will say that makes it much harder to find the bird in the frame because instead of just being able to move freely up and down and to the side, you're now tethered to this tripod, and you need to rotate yourself around the tripod. Anyway, that's a trade-off that you might want to consider.
Tony: Now let's go out to Chelsea and find out how to take pictures of flying birds.
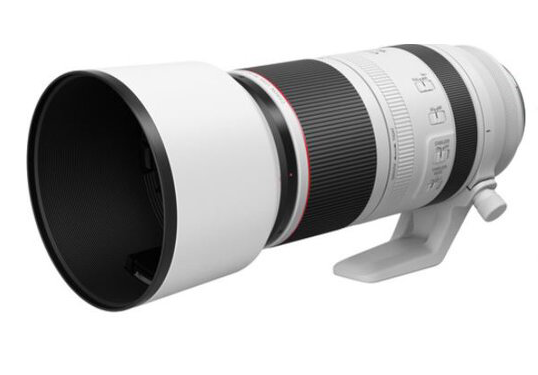
Chelsea: The first thing you need to do if you want to take pictures of flying birds is find birds. And my suggestion is not to go looking for the most exciting bird, but look for something plentiful and not afraid of humans. So that might be pigeons, gulls, sparrows—things that are common. You might not think they're exciting, but they're going to give you a lot of practice, and they're going to train you how to find birds in the viewfinder and perfect your settings. You can pick up this Canon 100-500mm at Milford Photo, and I recommend this zoom because it makes it a lot easier when you're first learning how to find animals in the frame. You'll notice when you're looking through the lens at 500mm, it's like trying to look through a telescope. But if you zoom back to 100mm, you can get practice at finding things in the frame and gradually zoom in as you get more practice.
Chelsea: The next thing to consider once you find your location with animals is how to position yourself. So you want your back to the sun because whatever you're pointing at is going to be illuminated by the sun. You also want your back to the wind. So this can be a little bit complicated; birds like to take off into the wind. Think about it like this: if you take off into the wind, it's pushing your feathers back. If you take off in the opposite direction of the wind, it's blowing the feathers forward.
Chelsea: Another more advanced tip for finding birds is to learn their behavior and their calls. I can hear that there's a kingfisher over there, but I also know that they're extremely shy birds. If I go walking over to it, it's going to fly away. If I wanted to capture this bird today, I'd have to go sit somewhere nearby where I didn't disturb it and wait until it got closer to me.
Chelsea: Let's talk about settings because they're important with wildlife photography, and they also can be a little bit confusing and complicated.
Chelsea: Oh my God, I can't find it, but I can... I know it's right there. I thought they were shy, but now I think they're just contrarian because I said he wouldn't come up to me and he does.
Chelsea: The first setting that I want to talk about is your image quality setting: whether or not you're going to be shooting RAW or JPEG. And there are reasons why you might want to shoot one or the other. If you're going to be shooting in high-contrast situations like birds flying against the light sky—a dark bird specifically—you'll want to shoot in RAW because you'll be able to recover the shadows more and bring down the highlights better. You don't have as much range for editing your photos in a JPEG file.
Chelsea: Oh my god, what the hell? I'm just trying to pay attention to making this video, and a kingfisher just dove closer to me than has ever happened in my entire life. I'm shocked and appalled. I'll keep going despite the heartbreak of a lifetime.
Chelsea: You might want to use JPEG if you want to maintain your high frame rate for a longer period of time, because RAW files are larger, your camera will have a more difficult time processing them, and so you'll start buffering sooner. Let me show you what I mean. So you can hear it interrupting. Let's put it into JPEG mode and see what it sounds like. It's not stopping. Oh, oh, so a little bit longer. If you need to track action for a very long time, consider using JPEG.
Chelsea: There are two settings that I like that I am not going to use with this camera right now, and that is silent shooting mode, because I'd have to use the electronic shutter, and that would cause rolling shutter. I don't want my pictures to be slanted when I'm panning and trying to chase a bird.
Chelsea: Next, let's talk about the mode. I like to use shutter priority, and that's the little Tv right here. And that allows you to choose the shutter speed, and then the camera is going to figure out your ISO and your aperture. Now, I put it on auto ISO so that the camera automatically chooses that, and then the only thing I have to worry about is adjusting the shutter speed. When I take pictures, I typically like to start out at a faster shutter speed with flying animals. So I'll start at 1/2000th, take some pictures, and then check them and make sure there isn't motion blur. If there's no motion blur, but it's very noisy today—there's not a lot of light—then I turn my shutter speed down a little bit and I'll try 1/1600th and see if I can still freeze motion at that shutter speed.
Chelsea: You'll notice that different animals require different shutter speeds. So a big, slower bird like a heron or a Canada goose, I can typically get away with like even 1/1000th or 1/1600th. But if I'm shooting really small birds like swifts, swallows, sparrows—anything small and fast like that—I want to go 1/2000th or maybe even 1/2500th to freeze the action.
Chelsea: One thing I want to change is Tony had you using this front shutter button, but I want you to try programming these two buttons in the back to do back button autofocus. And I'm going to assign them for two different scenarios that you're going to encounter.
Chelsea: In one scenario, you'll have a bird flying across a very complex background like trees where your camera might not be able to latch onto it. That single autofocus point will allow you to select exactly where you want it to autofocus in the frame. The second scenario is going to be the second back button for autofocus, and it's going to select a broader part of the frame. In this scenario, there will be a bird erratically flying on a plain background like the sky, and you just want your camera to just lock onto anything. For that, we're going to program wide area AF.
Chelsea [voiceover]: In the menus, go to the custom camera settings tab, page 3. Select customize buttons, scroll to the star button, and select it. Select metering and AF start, and then press info. For AF area, select whole area AF and select the corresponding checkbox. Press menu to save your settings.
Chelsea: One thing you're going to notice when you hold up your camera is that when you go to focus, it might be so out of focus that your camera has a hard time latching on. And scenarios like that want you to practice something called pre-focusing. If you see a bird flying and you know approximately where it is, first focus on something still near you like these grasses, and then move your camera up to the subject, and it will be more in focus, making it easier for your camera to grab onto it. At first, it takes a little bit of work and practice, but you get really good at calculating the distance of where the animal is and pre-focusing automatically. I do it without even thinking now.
Chelsea: And one last really helpful setting, and I love where Canon has this setting: this is the exposure compensation dial, and I use this for white birds especially. If you're looking at a bright scene with a white bird like an egret, then you'll want to expose the picture for the subject. So if it's a white egret, you want to actually select the exposure compensation and bring it down a stop or two so that you're not blowing out the highlights on the egret and losing all of that information in the photo on your subject. And it's easy enough for when you're done; if you go back to a dark bird, then it's easy to just reset it.
Chelsea: And the most important tip of all is to put in the hours and practice. It's difficult to do. It's difficult to get the bird in the frame. It's difficult to figure out the right settings for every animal. It just takes practice. And if you enjoy it and just relax and accept that you're going to make some mistakes, you're going to get some blurry photos, and that it's okay—it's just a part of the process—then you'll be better off. Just keep shooting, keep taking pictures, and keep practicing.
Chelsea [voiceover]: In the comments below, tell us your favorite wildlife photography tips. Subscribe and enable notifications to see our upcoming photography tutorials, and then next time you buy camera gear, support a small business, Milford Photo, by going to milfordphoto.com/tonyandchelsea. Whether you're shopping online or in their beautiful Connecticut store, the experts at Milford Photo can help you choose the perfect gear. Thanks for sponsoring us, Milford Photo!